Clearance Ops
Updated:
Region bosses, the main source of weapons: each boss’s loot, the routes, fight tips and a fight video per region.
Ads help keep this site running. If you don’t mind, allow ads on it in your ad blocker.
How it works
- The main way to get weapons: defeat bosses on a region map. Each boss has its own loot: in the table below each region is followed by its bosses, each with a row of its rewards, as in the game. The bar under an icon shows the grade (S orange, A purple, B blue), the corner shows the level and the tooltip the name; weapon stats are on the Weapons page.
- EX variants are level 70 S weapons from regions 11–15; LW variants are lighter versions of A weapons with slightly lower Hit and Crit. From region 10 on, S weapons have 3 accessory slots, and the accessories that can drop with them are listed in the tooltip.
- A map has 3–4 bosses and weaker enemies; beat all of them or retreat after a few. Attack routes unlock as you progress: central routes reach specific bosses quickly, while Hard routes meet heavy resistance but are the fastest way to defeat every boss.
- Energy is paid per turn: 8 for the first turn and 3 for each turn after it. A battle lasts at most 15 turns, so starting one needs 50 Energy, and a shorter fight costs less.
- You can save a battle’s result (up to 3 records per region) and then Sweep the region from a record: same Energy cost, same bosses defeated.
- In later Frontier Trials, battles and sweeps here earn Depth Rewards; certain Depth milestones unlock new Clearance Ops regions, Armed Conquest sections and Critical Operations.
Regions and bosses
| Region | Tips and notes |
|---|---|
| 1. Rekindled Spark The GSA learns of a secret Obsidian lab near Rayneburg running pilot experiments and sends Kaidan's squad in to free the subjects. |
Guide▶ Watch |
BossLoot | |
| 2. Fading Light Mercenaries raid convoys in the lawless border zone between the DL and the UNCS; the big companies put a bounty on them. |
Guide▶ Watch |
BossLoot | |
| 3. Savage Growth Parill Desert breeds crime and mercs. Enhanced fighters flock here chasing glory and credits. No matter how many get wiped out, they keep coming back like weeds. | Bertha and her escorts fire first at anyone who attacks inside her zone. Mann stands near fuel barrels: lure him next to one and he is easier to finish. His rockets hit an area, so don’t bunch up. Guide▶ Watch |
BossLoot | |
| 4. Longest Day GSA found Ashes outposts. NDF STs deployed for containment. GKD was hired to create chaos and break the blockade, securing escape routes for the Ashes. | The hard route comes in from behind: the path is easier and all bosses fall in fewer turns.  Hong and Hong and  Naomi help a lot. Naomi help a lot.Guide▶ Watch |
BossLoot | |
| 5. End of the World Terrorists control Monolith Valley, cutting off north Maratur. Intel shows foreign merc ties and ST tech acquisitions. Harpy contracts Kaidan to neutralize the Maratur forces. | Kill the left or right boss at the main gate to open the matching side gate.  William and Hong matter most. William and Hong matter most.Guide▶ Watch |
BossLoot | |
| 6. Eagle's Nest Op DLAF reports Iguana mercs hit Belsuth boot camp targeting Admiral Sean's officer corps. Until the leak's plugged, the Admiral's bringing in outside contractors to defend camps and eliminate the Iguanas before more recruits die. | The hard route is the rear assault.  Frida fits well with area damage and a hit debuff. Bring a range booster: William or Frida fits well with area damage and a hit debuff. Bring a range booster: William or  Natalia. Natalia.Guide▶ Watch |
BossLoot | |
| 7. Rule of Violence The Lunos started as miners' protection in early Milkhama. As local industry died, they became an iron-fisted crime syndicate. UNCS police can't touch their stronghold despite evidence. They're reduced to posting bounties for unofficial forces. | Guide▶ Watch |
BossLoot | |
| 8. Across the River The Iguanas are back on the high-bounty list. Someone's got a score to settle. Their base lies deep in a dense jungle. Bridges are down. STs and drones patrol a fortified stronghold. Where's the weak point? | Three routes: repair the north bridge, the south bridge, or break into the centre. The tactical boss appears only at the south bridge and the centre. Guide▶ Watch |
BossLoot | |
| 9. Code Nightingale Behind Milkhama's facade of peace, powers wage shadow wars. Intel ops are too hot for official channels to get outsourced to neutral mercs. And mercs take out other mercs. | Three routes: regular, quick raid and all-in. The shock-round boss does not appear on the regular route. Guide▶ Watch |
BossLoot | |
| 10. As the Stars Entwine After the battle, the Monolith Valley Armed Forces split, with Meritus and Eller taking a military base in the Parill Desert, angering local interests. | The tactical boss appears only on the two harder routes. Guide▶ Watch |
BossLoot | |
| 11. Storm From the Sea After their defeat, the Monolith Valley Armed Forces secured additional funding and deployed senior cadres to strengthen their ranks. They now control a military depot in the Parill Desert, causing unrest among factions in Milkhama. Consequently, GKD Squad has been given a new mission. | Each time he is attacked Pip gains a Defensive Stance stack: −30% damage taken and +8% hit, up to 3 stacks. Unlocks at 90% Depth on the Frontier Trial stage To the Very Ends. Guide▶ Watch |
BossLoot | |
| 12. Beneath the Shadows The Thepia Wasteland has seen increased activity, with a mobile squadron suspected of secretly working for a DL councilor. A mysterious employer has hired the GKD Squad via Skynet to disrupt their operations. | Vera appears only on the two harder routes. Unlocks at 50% Depth on the Frontier Trial stage Neglect. Guide▶ Watch |
BossLoot | |
| 13. Comeback Milkhama has seen countless renowned mercenary teams, some as fleeting as shooting stars, while others rise again and again like wild grass sprouting from the ashes. The Douglas Mercenary group belongs to the latter breed. | Unlocks after the Chapter XII Emergency Op. Guide▶ Watch |
BossLoot | |
| 14. Shrouded in Mist Strength is the only means to ensure balance. Now, the UNCS's military power is weak, forcing the military to employ various forces, even including former fugitives. Of course, this is done privately. | Guide▶ Watch |
BossLoot | |
| 15. Hidden Motives The situation in Milkhama is turbulent, with various forces stepping in, intertwining with each other, each harboring ulterior motives and waiting for the best opportunity to intervene. | Guide▶ Watch |
BossLoot | |
| 16. Nova Burst For so many years, Milkhama has been like this. A genius rises here, a nova appears there, today a rising star emerges, and tomorrow there will be a supernova. They are all eager to prove themselves, but as for the outcome, that’s hard to say. | Unlocks after any route of Hidden Motives; its four bosses stay hidden until then. The bosses below come from a fight video; their loot is not captured yet. Guide▶ Watch |
Boss | |
| Crossroads of Memory At the crossroads, going left or right is a philosophical question. If given another chance, would they still set foot on Milkhama and choose to become mercenaries? | Marked “Open” in the region list. Before the battle you pick the drop range (chip sectors): α 1-3, β 1-3, γ 1-3 or γ 4-6. Guide▶ Watch |
BossLoot | |
 Hyena Lv. 7
 12
12 9
9 8
8 10
10 9
9 8
8 14
14 10
10 8
8 15
15 13
13 Lone Wolf Lv. 8
 14
14 10
10 10
10 8
8 11
11 12
12 11
11 8
8 10
10 9
9 15
15 14
14 14
14 Vulture Lv. 15
 16
16 14
14 15
15 15
15 13
13 14
14 14
14 10
10 8
8 11
11 12
12 11
11 Michaela Lv. 13
 19
19 19
19 21
21 18
18 21
21 20
20 20
20 Keller Lv. 15
 21
21 22
22 23
23 21
21 21
21 23
23 23
23 Sámi Lv. 20
 25
25 25
25 24
24 24
24 23
23 23
23 Bertha Lv. 23
 Mann Lv. 23
 Douglas Lv. 28
 Hayato Lv. 30
 Sunny Lv. 33
 37
37 Crotti Lv. 35
 Ridgewald Lv. 36
 Egbert Lv. 38
 Eller Lv. 40
 Meritus Lv. 40
 Gutzman Lv. 41
 Castilla Lv. 43
 Georgia Lv. 45
 Garcia Lv. 46
 Vincenza Lv. 46
 Deborah Lv. 48
 Genovese Lv. 50
 Jon Lv. 51
 Rena Lv. 52
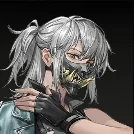 White Flame Lv. 57
 Kaylen Lv. 58
 Taio Lv. 63
 Liliya Lv. 67
 Pip Lv. 71




 Andrea Lv. 77


 Adrien Lv. 79
 Vera Lv. 79









Ads help keep this site running. If you don’t mind, allow ads on it in your ad blocker.